Showing posts with label custom. Show all posts

Friday, October 14, 2011

Notes on Customization of Blythe Dolls: MAKE-UP

MAKE-UP                


After sand matting faces, you may want to put color back into your doll's face.  There are a few tutorials on-line to help you do this.  


All faces sanded ... now to spray with MATTE clear, prior to make-up application

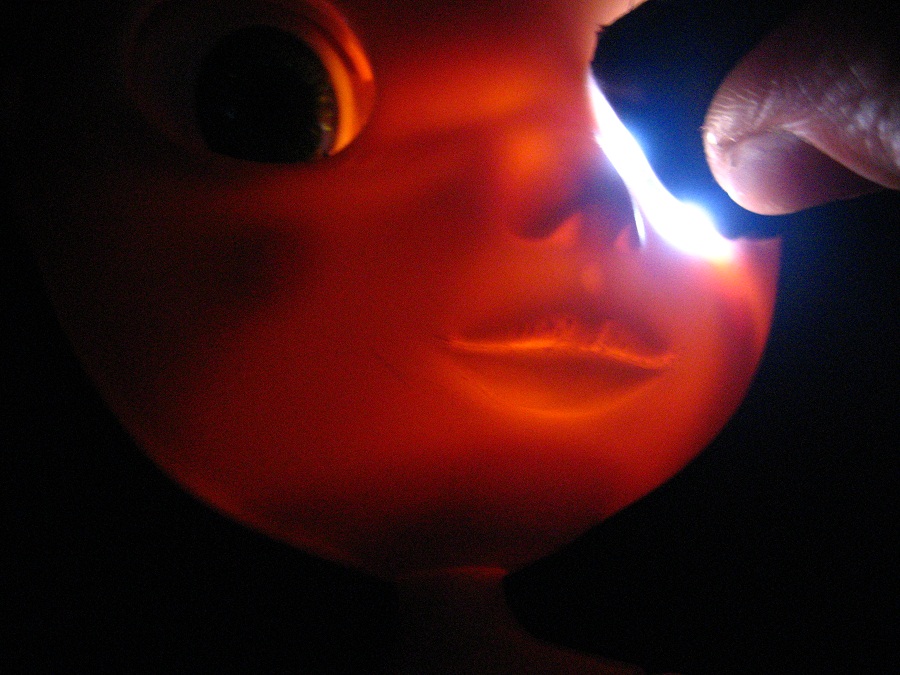
close-up of face-up BEFORE

Airbrush methodI DO NOT OWN AN AIRBRUSH painter.  I do not have any intention of becoming a professional customizer, or investing in the (costly?) equipment.  I just wanted to make a NICE FACE on each of my girls.  NOTHING too fancy …. Just a nice and NATURAL looking.  But here is what I have found:


LBE and BLYBE TYPE CLONES with HARD PLASTIC FACES: 

          EVEN though you have sand-matted their faces …. The pucci collective is correct:  IT IS HARD TO GET PASTELS (chalk) TO SHOW ANY REAL COLOR !!!  I tried and tried and TRIED …. Until I CRIED !  I was thinking, DARN I came this far, HOW COME THE COLOR WON’T STAY !!!!!?????? #%^^$@$^^$##@*&!!!  I had CHALK DUST EVERYWHERE …. But NONE OF IT was sticking to the doll !!!!  ARGH !!!  I ended up just putting my FINGER into the chalk and dust I had on paper, GROUNDING it in … then GROUNDING it into the FACE! 
I know …. I NEVER saw or read ANYONE giving THAT ADVICE …. But at this point, I did not care, I just did what ever worked!  

[ I bought two chalk sets:  One at Michael's and one at JoAnn's.  Very reasonable prices.   Just be sure they are NOT oil pastels. ]

Planning what hues for each girl, to be sure they all look DIFFERENT


 RE:  Face-ups using paint

            I did SEE a nice YOU-TUBE video on “how to suck less at face-ups”.  [ I should go find that again to give her the credit she deserves ... ] The artist was VERY good, and she was making sort of a dolfie~pullip type doll … from scratch (blank face).  Her advice was to get GOOD artist quality paints (advice I should have had at the beginning, before I started all my eye chip mania … );  and a good ‘medium’ … not water. 


TIP to save $$$:  Use disposable plastic when painting.  Normally not much paint is used/ needed, so little plastic pieces are perfect for this ... then you can just throw them away!


She also used MR. SUPER CLEAR, and for the life of me, I know it is reportedly the BEST, and you just have to have it, etc…… but I was NOT going to go back on ebay and spend one more DIME, and who knows?  Maybe it would not WORK on the CLONES!  So, forget it. 

I just went to Michaels Craft store and got some “KRYLON Super Clear” in matte for preserving pastel (and other) type works.  I just thought:  I WILL TRY IT on my ‘murder victim’ and see if it works.  I tried it … it was “so so” …. But STILL not as good as THE REAL BLYTHE DOLL WAS/ IS….. without spraying anything.  I also concede that the benefits of using MSC vs. another brand may ONLY be noticable "in the long run" ... but for me ...and for now ... it worked perfectly fine.  I have seen no changes, no yellowing, etc. for the past 9 months ...

Back to the video  ...   ANOTHER thing I liked about her video was:  she HAD WORDS ON THE SCREEN !  This is VERY RARE on You-Tube, but helped me tremendously …. Because I was viewing them on a computer without speakers, and I “got” everything she was teaching.  So, THANK YOU.


MAKE-UP PROGRESS ...
           
I normally don't the “stock” green and / or blue eye shadow that I have seen on factory-issue Blythe dolls … so I knew I would not only be REMOVING any existing eyeshadow, but NOT trying to duplicate it either.  I DID however, see some very interesting ideas on flickr, which I tried to … well, not exactly COPY, but emulate.  OF COURSE, when I got out my pastel chalk, and it didn’t stick….. The EYESHADOW that I did try, that eventually stuck …. looks like CRAP. 

Just a little experimenting with acrylic water-based paint to see if I could make LIPS ...

This was my attempt to put "frosted" lines on a solid color lip ... sort of an "apple" effect ....


            The CHEEKS look ‘so-so’ … From a distance.  Close-up … not so much.  I am thinking that it HAS TO BE the HARD PLASTIC again.   Because when I tried to put even just a TINY bit of pastel on the REAL BLYTHE ….. IT STUCK IMMEDIATELY!  So, there you have it.

Here is another tip:  When painting on faces:  Just stick to acrylic paint.  I did attempt to ADD a bit of my own lip gloss to the paint, and it sure did LOOK GOOD ... but then a flickr friend told me:  DON'T DO IT !  THE OIL IN THE LIP GLOSS WILL ERODE THE PLASTIC ... and he was right!  So, Thank You Sailorb :)


There just has to be some "secrets" that I have not found, or that I just don't "get".  I know that a layer of MSC (Mr. Super Clear) prior to make-up is supposed to give the chalk "legs" to stick to ... so I can't fully complain, as I did not use that. 

At this point, all I really wanted to do, was to GET TO MY DESIGNS already!   And so ...


* Disclaimer on ALL of my NOTES:  I am not a true customizer.  I have only done the few girls that I own, 7 Little Big Eyes, 2 Blybe, and one real Blythe.  The caliber and skill and professionalism that is so evident by the lovely flickr pictures ... well there is no comparison to my extreme amateur attempts.  HOWEVER, ALL I really wanted to do was to change them from the hideousness that I saw, into just a teeny bit more beautiful, for my own pleasure and sense of accomplishment.  I do not now, or ever, plan to offer my own skills at customization ... the reason for these blog entries is to help the few out there who would like to do just a few little steps, without spending ANOTHER huge amount on their already expensive girls.

Notes on customization of Blythe Dolls: CARVING

Notes on Customization:  CARVING


Okay, HERE is my newbie CONFESSION:  When I first noticed this Blythe doll / world on flickr, I kept coming across photos of Blythe dolls "in progress" of many stages of customization. 

The bizarre part was, that under each photo as the caption was as follows:

     "HERE is my FIRST ATTEMPT at customization."

And / or

     "HERE is my FIRST ATTEMPT at nose carving, lip carving ", etc. 

And WHAT did that photo show???  PERFECTION every single time! 

I have NEVER seen anyone post their FIRST TIME AT ATTEMPTING TO CARVE A FACE, and SHOW THEIR FAILURE!!!  WHY IS THIS?????  Hmmm, I do not know.


So, with that being said:  I am going to show you MY EPIC FAIL at MY FIRST ATTEMPT AT FACE CARVING.  (well, truthfully, I think ALL my efforts at carving are pretty horrible, but THIS ONE is just “dolly-cide”, as I have murdered the poor girl.  IF it was a REAL BLYTHE, and IF I had spent hundreds on this doll, perhaps I would attempt a ‘fix’ …. But now that I have experience with clones AND real Blythes, I don’t think this epic FAIL would happen on a REAL BLYTHE, they are made SO MUCH MORE DIFFERENTLY !

This photo shows the OVER-CARVING of her mouth and philtrum area

Close-up of the EPIC FAIL  (this is a Blybe / CCE doll)

The CLONES (Blybe/ CCE/ LBEs) are made of a very, VERY hard plastic.  To “carve” this is nearly impossible.  It just doesn’t ‘give’ the way a REAL BLYTHE face does. 

Secondly,  the plastic is VERY, VERY THIN in places, and THUS THE HOLE in my now-Popeye looking dolly face.

Here is a HINT:  IF you are concerned about the thickness of plastic you have to work with,
Just take the doll into a dark area and shine a flashlight underneath ...

This will ILLUMINATE the weaker areas, so that you don't carve through the thinner areas.


NOSE CARVING:

            The first nose I tried to “carve” was an LBE.  And stupid me, I thought they really meant “carving” !  but AGAIN, carving on a REAL BLYTHE is possible, while on this EXTREMELY HARD PLASTIC of a clone, the exacto just has no effect! 

To get any sort of progress/ shape ... I had to SAND THE HELL OUT OF HER NOSE!  Sand as in SANDPAPER, Emery boards, and the like.

Luckily her nose had a LOT of plastic on it, but still … I did take my guinea pig into a dark room and shone a flashlight into one of her eyesockets, just so I could tell how much plastic I had left to carve.  I did feel VERY close to the edge a few times, so perhaps I should be grateful I didn’t commit further dolly-cide!

Even though I now have 7 dolls that are EXACTLY the same (Little Big Eyes all have the SAME face;  they only came out with 4 ... in 2001.  There ARE prototypes out there, VERY rare, but basically, only ONE FACE MOLD ) ...

I still wanted each of my girls to look SOMEHOW “different” ….. I did NOT want them to look like a bunch of CLONES OF CLONES!  

I did carve ALL 7 LBE noses.  Some do look the same, I’m afraid, but none of them have a bulbous nose any longer.  I just wanted them to be as small as possible, because after I got my REAL Blythe, I put them "nose-to-nose" and there IS a noticeable difference in their profiles.  Some of the differences are fixable, but some are not.

LITTLE BIG EYES:  Left:  ORIGINAL PROFILE  ... Right:  AFTER some carving

LBE:  My FIRST carving attempt ... I nearly took her nose and lips OFF ...

LBE:  Another carving job where I nearly carved her lips off ...


Regarding BLYBE/CCE clone:  when it came time to carve this doll, again, HARD PLASTIC !  I kept looking at ALL those awesome BLYTHE pics on flickr of ALL the customizers who apparently do this for a living, and making THOSE LIPS!  THAT NOSE! ..out of THIS?  Well, I couldn’t understand HOW DO THEY DO IT?????  [okay, I STILL don't know HOW they do it ! ]

Regarding my REAL BLYTHE DOLL:  I like the nose that she came with, except for the teeniest bit of "point" to it ...  All I had to do was sand it down just a tad, “pug it” just a TEENY-TINY bit, which was SO EASY compared to the carving on the plastic of the clones.  No comparison. 

LIPS !                              


 AGAIN, hard plastic.  I worked on the first LBE a LOT … but the results are just … well, AMATEUR at best.   THIS is also where I killed the CCE.  The lips.  I could not, for the LIFE of me, “carve” any sort of SHAPE into them.  SURE, I don’t have “diamond files” or whatever it takes that the TRUE PROFESSIONALS use … but even if I had those tools, I still look at those flickr pics of the pros ... with wonder and awe !  

In the end, I decided to JUST LEAVE THE LIPS of the LBE’S.  I just sanded off their lipstick, but not much more ... It was BETTER than carving the lips OFF into oblivion, which I did do on at least 2 of them (sorry girls !!!) 

Lip Carving of my REAL BLYTHE:    When I finally proceeded to attempt a carve the lips on my REAL BLYTH .... the texture was …. SMOOTH AS SOAP !  I was thinking to myself, WELL HECK!  THERE IS NO COMPARISON HERE!!!  It was SO EASY to “carve” a different shape to her lips!  IMAGINE THAT.  THIS was the moment that I thought … WHY does everyone say to get a CLONE to practice on?  It is like trying to PRACTICE doing the high-wire with dental floss.  It is like trying to PRACTICE running a marathon in flip flops.  NO COMPARISON. AND EPIC FAIL GUARANTEED.


FINAL NOTE ON LIP CARVING:  I still do not know how to carve the BEAUTIFULLY SHAPED lips that I have seen on flickr and have seen the PROS do.  Even though the FACE / LIPS are more “carve-able” on a "real" Blythe vs. a Clone … still doesn’t help if you don’t have the SKILL to make the beautiful SHAPE. 

I BARELY changed my REAL BLYTHE’S lips … just TRIED to make her look a BIT more “smiley” … as she looked a bit GRUMPY at first … and don’t get me started on that COLOR they chose to put on her!  I mean, REALLY?  MAUVY-PINKISH-PURPLEISH lips on a GREEN FACE?????  Yikes.  Those I had no hesitation taking OFF !

REAL BLYTHE:  Before (as she arrived out of the box)  ... and After:  She has a matte face; pastel make-up;
New eyelashes;  New hand-made-by-me eyechips;  Carved nose and lips; slight haircut;
Peachy lipcolor painted with acrylic


* Disclaimer on ALL of my NOTES:  I am not a true customizer.  I have only done the few girls that I own, 7 Little Big Eyes, 2 Blybe, and one real Blythe.  The caliber and skill and profesionalism that is so evident by the lovely flickr pictures ... well there is no comparison to my extreme amateur attempts.  HOWEVER, ALL I really wanted to do was to change them from the hideousness that I saw, into just a teeny bit more beautiful, for my own pleasure and sense of accomplishment.  I do not now, or ever, plan to offer my own skills at customization ... the reason for these blog entries is to help the few out there who would like to do just a few little steps, without spending ANOTHER huge amount on their already expensive girls.

Thursday, October 13, 2011

Notes on Customization of Blythe Dolls: EYES: EYE LASHES

THIS SECTION will be all about EYE LASHES:


First of all, I HATE the factory lashes.  I just don’t like them AT ALL.

I knew right off the bat, they were ALL going …. Real Blythe and Clones alike.

            LBE’s lashes came RIGHT OUT, no problem.  LBE lashes are BROWN.  They are attached BEHIND the eyelid, and not inside a “slit” like real Blythe and Blybe. 
LASHES of an LBE Doll:  Attached to lid with tiny piece of masking tape


Obviously the eye mech is also completely different on an LBE doll, as it is not controlled with a string and tiny spring, but a massive, huge spring that is connected to a BUTTON on the back of her head.  This button also has a sticker attached with the words:  PUSH HERE.  Not kidding. 


            So, REPLACE ALL EYELASHES.  Sounds easy enough …. But OH NO !  So sorry Cheap Girl, but You bought yourself an ADG as your first Blythe … the one with the eyelashes SUPER-GLUED IN!!!! 

            After removing the LBE lashes and the Blybe lashes without incident … I tried the real Blythe.  NOPE.  Not coming out.  For anything. 

So, what does Cheap (stupid) girl do?  Yep, I got out my ACETONE and proceeded to try and get them out with a Q-tip soaked in acetone!  Yikes!!!  So of course the acetone proceeded to eat up the plastic.  For some bizarre reason, maybe perhaps due to all the other sh—I have been through, I could not find myself to CARE!  I just thought, oh great, whatever!  And truthfully … THE ACETONE DID NOT EVEN WORK !!!!!  I ended up with a MANGLED EYE MECH, and never got all the pieces of lashes out, or whatever it is they have in there!  THIS all and mainly due to the fact that I could not find ANYWHERE on line, any helpful hints regarding the lashes of The Ashton Drake Galleries BLYTHE dolls!

            Not to worry, I told Nenetl (her name) … I will still make you BEAUTIFUL!!!  WHO CARES if your eyelids are all mangled?  When I get done, no one will even NOTICE !  

ORIGINAL eyechips (spokes) and lashes (plastic)

AFTER:  Removed stock eyelashes;  replaced with 2 pair of lashes for women

SEE!  You can hardly tell she has mangled eyelids ... don't look TOO closely  ;)


            ACTUAL LASHES:  WHY pay $5. or more for a pair of “Blythe eyelashes” …. When you can go to the 99 Cent Store and get them there?  I purchased 15 pair, because I planned to double-up on them, and to me, one of the smartest thing that this Cheap Girl has found for her Girls !


           BLYTHE DOLL;  INSTALLING LASHES:  Just a bit more difficult ... due to the fact that even though there was a "slit" for installing the lashes, I found this to be too limiting a space for the effect I was going for. 

            LBE DOLLS;  INSTALLING LAHSES:  I KNEW that the original stock lashes were installed BEHIND the eyelid, so I applied a TEENY-TINY bit of tacky glue on each lash (eyelash glue DOES NOT STICK to plastic) and of course the lashes are NOT going to stay in a curved position while drying, so I had to use straight pins stuck into her eye ... to anchor each one down with 3 pins at a time for a few minutes, before moving on to the next lash …. X 7 dolls … 2 eyes each …. Deep sigh.

            ON Blybe:  DUE to the fact that the plastic is SO HARD, and NOT PLIABLE IN THE LEAST, even inserting a pin in each side was not working.  And of COURSE I broke one of her eye slits too, because the pin just slipped and chipped the plastic.  Again, here’s me:  WHAT.EVER.

            On ADG BLYTHE:  AFTER totally anhiliating the eye mech … (have you ever seen plastic treated with acetone in addition to a person digging into it with a dull exacto tool? ) … I decided to just GLUE THE LASHES ON TOP of the supposed “slit” that was now more like a big trough, but not an empty trough … a trough filled with ?  whatever the heck they put in ADG eyelash slots!  Could not get that crap out for ANYTHING!  So, on top of the slit AREA, I glued one row of lashes.  THEN, on top of THAT, I glued ANOTHER ROW of lashes.  And if I need to, I will PAINT part of the eye mech BLACK ... sort of like an eyeliner ...to further try and hide any traces of what I have destroyed.  Poor, POOR, Blytheeeee !


* Disclaimer on ALL of my NOTES:  I am not a true customizer.  I have only done the few girls that I own, 7 Little Big Eyes, 2 Blybe, and one real Blythe.  The caliber and skill and profesionalism that is so evident by the lovely flickr pictures ... well there is no comparison to my extreme amateur attempts.  HOWEVER, ALL I really wanted to do was to change them from the hideousness that I saw, into just a teeny bit more beautiful, for my own pleasure and sense of accomplishment.  I do not now, or ever, plan to offer my own skills at customization ... the reason for these blog entries is to help the few out there who would like to do just a few little steps, without spending ANOTHER huge amount on their already expensive girls.

Notes on Customization of Blythe Dolls: EYES: EYE CHIPS

THIS SECTION will be about the EYE CHIPS themselves:

* Disclaimer on ALL of my NOTES:  I am not a true customizer.  I have only done the few girls that I own, 7 Little Big Eyes, 2 Blybe, and one real Blythe.  The caliber and skill and profesionalism that is so evident by the lovely flickr pictures ... well there is no comparison to my extreme amateur attempts.  HOWEVER, ALL I really wanted to do was to change them from the hideousness that I saw, into just a teeny bit more beautiful, for my own pleasure and sense of accomplishment.  I do not now, or ever, plan to offer my own skills at customization ... the reason for these blog entries is to help the few out there who would like to do just a few little steps, without spending ANOTHER huge amount on their already expensive girls.

So any of the steps I used, are explained here, JUST FOR FUN :)

EYE CHIPS for Blythe and Blythe - Like/Type  Clones:


            First of all, let me say, I LOVE all those beautiful, sparking, fantastic colored eye chips out there!  And the ones that look like REAL EYEBALLS?  Well, those are AMAZING!!!  The artists that can hand paint a chip to make it look like a real eye … just fantastic. 

            Here is my problem:  I AM POOR.  Well, not exactly, but I AM in debt, and on a budget!  So, spending $4.-$5. for ONE PAIR of chips …. Times 10 dolls that I have … times they each have 4 pair …. Would be MINIMUM EXPENSE OF $ 200.  JUST for the cheap-o looking ones that I don’t even like all that much, because I have a problem with the “spokes”.  Okay, so that is just me … please don’t be offended if you prefer those, we all have our individual preferences J  OH, and if I were to purchase the hand-painted, realistic looking ones, for $20. a pair …. Times 10 dollies  …. Times 4 each … $80. per doll, x 10 …. $800. !!!!!!!!!!!!!!!!!!  Really ???????

            So, what is the CHEAP GIRL do?  I already knew there was NO WAY I was keeping those hideous eye chips the way they are ….


STOCK EYE CHIPS on ADG (Ashton Drake Galleries) BLYTHE DOLL:  AZTEC ARRIVAL

STOCK EYE CHIPS for Blybe /  CCE "Clone" doll

STOCK EYE CHIPS for LITTLE BIG EYES (LBE) Dolls

 MY EXPERIENCE WITH THE STOCK EYE CHIPS THAT CAME WITH EACH DOLL TYPE:

            Blybe type clones:  The CCE dolls chips were SO cheap looking, even compared to the “Blybe” Basaak clone, it was not funny.  (the very first one I tried to take out, but ONLY after I had put the poor girl in the hospital and knew she was a gonner … broke in half right off the bat with the gluestick method.)  The Blybe clone’s eyes were “so so” and very similar to the Real Blythe’s … EXCEPT that the pupil is MUCH smaller, just MAGNIFYING that “deer in the headlights” that I can’t deal with.  JUST can not.

            LBE:  A domed piece of plastic, in a dull boring color, with absolutely NO life, NO spark, even SPOKES would be better than these chips.  They are dull, lifeless and just not acceptable.  I think the blank eye socket painted with a Sharpie marker would be better than these chips (!)   I took them ALL out of all the 7 LBE dolls, soaked them in rubbing alcohol per the Pucci tutorial, let them soak overnight and brushed them all clean.  I put one pair BACK into my “guinea pig” and added FOIL (again, here, as the Cheap Girl … I used some old Christmas wrapping paper from circa 2001 … ), added more BLACK to the pupil, and took a comparison shot next to another LBE, and there is some improvement.

STOCK EYE CHIPS ON LBE DOLLS:  LEFT;  Stock  RIGHT;  Cleaned and added FOIL and enhanced pupil

 SO, after I purchased too many of these dolls, I knew I had to do "something" ... so LET THE RESEARCH BEGIN! 

Started searching on etsy, ebay, and all over the internet ... and saw some AMAZING ones on flickr ... and my reaction was:     
         
“WOW !  Those hand-painted eye chips look SO cool! … but ... $20.00 for one pair?  Oh geez ..."

And like the thrifty little resourseful person that I have always been ... began to wonder ... HOW did THEY learn to do this?  I searched until my brain was fried and my fingers were numb ... but for the life of me, I could not discover ANYWHERE where there was even a tutorial, a "how-to", a class I could join ... NOTHING!  This still has the ability to perplex me, to this day ... I mean, HOW DID THEY learn how???

That is when I had to realize that I was either going to have to fork over BIG BUCKS, or think of another solution to changing my girls' eye chips ... knowing FULL WELL that I had not the materials, nor the resources or equipment, much less the TALENT for painting what I saw as some more beautiful than life-like eyechips I had seen... 

But whatever I could come up with, seriously couldn’t be much worse than the hideous spokes of the Blythe~Blybe or the dull and boring of the LBE …..

            SO…… I began MAKING EYE CHIPS! 

I know, I know …. How very ridiculous.  And if you look closely, they are very amateur …. But… it was either that, or SPEND $800. for what I REALLY wanted ! 

  HERE are some of the methods I used:         

I took the stock eye chips and PAINTED RIGHT OVER THEM!  I also figured, heck, if I didn’t like them, I could just remove the paint with alcohol, and nothing would be lost (except for my time and frustration, of course).  Then, I even took SEWING BUTTONS out of my “bag of tricks” already on hand for my crochet creations, and PAINTED ON TOP OF THOSE, and topped with varnish!  And again, ad naseum, if thought to myself .... if I had this idea, I am sure TONS of people have had this idea !  so I know I am not original in my “cheap-ness” J

           
LITTLE BIG EYES DOLLS:  4 NEW SETS OF EYECHIPS;  HANDMADE BY ME

LITTLE BIG EYES:  4 NEW PAIR EYECHIPS HAND-MADE BY ME

LITTLE BIG EYES:  4 NEW PAIR EYECHIPS;  HANDMADE BY ME

LITTLE BIG EYES:  4 NEW PAIR EYECHIPS, HANDMADE BY ME

BLYTHE DOLL:  4 NEW PAIR EYECHIPS (I HAVE SINCE MADE NEW ONES FOR HER ...)